

TradingView Risk Management Setup Tips for Pro Traders
TL;DR:
- A professional TradingView risk management setup involves fixed-dollar or fixed-percentage sizing, a minimum 1:2 risk-reward ratio, and automation through Pine Script and webhooks. Traders should verify risk, invalidation points, and position size before every trade, using visual tools and code indicators for accuracy. Automating drawdown limits and execution with hotkeys helps reduce errors and enforce discipline in live trading conditions.
Enforce fixed-dollar (or fixed-%) risk sized to a chart-defined invalidation point, require a minimum 1:2 risk-to-reward ratio, and automate both sizing and enforcement with Pine Script indicators and webhook alerts. That’s the core of a professional TradingView risk management setup.
Apply these now:
- Accept the maximum possible loss in dollar terms before placing any order
- Use TradingView’s Long/Short Position tool to verify R:R visually on every setup
- Install a Pine Script position-size indicator that outputs exact lots or contracts given your fixed-dollar risk
- Route alerts via webhook to an external monitor or execution tool for automated enforcement
- Track daily drawdown with a dedicated alert so a breach stops trading automatically
Done right, this setup eliminates sizing errors, removes emotional decision-making from position sizing, and keeps prop-firm drawdown rules intact without manual babysitting.
Table of Contents
- What pre-trade hard rules should you apply before any entry?
- How do you calculate position size and check risk-to-reward?
- How do TradingView’s built-in tools and Pine Script automate risk math?
- How does UI setup reduce execution errors?
- How do you automate drawdown monitoring and anti-overtrade rules?
- Active trade management: partial closes, break-even, and trailing stops
- Validate before going live: replay, demo, and backtest checklist
- Implementation checklist and sample Pine Script snippets
- Key Takeaways
- What pro traders actually do when conditions break down
- The Key-trade Professional Trading Keyboard fits this workflow
- Useful sources for further reading
- FAQ
What pre-trade hard rules should you apply before any entry?
The correct workflow is always: invalidation point first, then distance, then size. Most traders invert this and end up with positions sized to what they want to risk rather than what the chart dictates.
Before every entry, confirm:
- Account risk cap: Fixed dollar amount or fixed percentage of current equity (not notional balance)
- Invalidation point: Where the trade is structurally wrong, defined on the chart before touching the order ticket
- Distance to stop: Measured in price points, then converted to dollar risk using tick value or pip value
- Friction buffer: Add spread, expected commission, and a slippage estimate to the stop distance before calculating size
- Correlation check: Review open positions for directional overlap; correlated trades compound real exposure beyond what any single position shows
For prop desks, add hard guardrails: daily drawdown cap (hard stop, not a soft reminder), maximum trades per session, and a mandatory cooling-off period after any drawdown breach. Document every override.
Pro Tip: Run the same pre-trade sequence before every entry, not just when you feel uncertain. Decision quality comes from process consistency, not mathematical perfection.

How do you calculate position size and check risk-to-reward?
Two formulas cover most situations.
Fixed-dollar risk:
Units = Dollar Risk ÷ (Entry Price − Stop Price)
Percent-of-equity:
Units = (Account Equity × Risk%) ÷ (Entry Price − Stop Price)
For futures and forex, convert first. Identify the tick value or pip value for the specific contract, then express the entry-to-stop distance in dollars before dividing. A one-point move in NQ is worth $20 per contract; a one-pip move in EUR/USD standard lot is $10. Skipping this step and relying on raw price distances is where sizing errors cause liquidations.
Worked example: For example, if you have a large account and risk a small percentage per trade, the units calculated depend on the entry price, stop loss distance, and the tick or contract multiplier. Always reduce the theoretical size slightly to leave room for commissions, spread, and slippage.
Always reduce the theoretical size slightly to leave room for commissions, spread, and slippage. A 3–5% haircut on the calculated size is a practical buffer for most liquid instruments.
Professional standard: A minimum 1:2 risk-to-reward ratio is the baseline most professional desks mandate before executing a trade. Higher-volatility instruments or lower win-rate systems often require 1:3 or better to remain profitable over a large sample.
How do TradingView’s built-in tools and Pine Script automate risk math?
Using the Long/Short Position tool
Draw the tool from your entry to your stop, then extend the target line until the R:R label reads at least 2.0. This takes about ten seconds and gives you a visual sanity check before you open the order ticket. It’s not a substitute for the exact calculation above, but it catches obvious mismatches instantly.
Pine Script position-size indicators
Advanced traders use Pine Script indicators that accept fixed-dollar risk, leverage, and fee inputs and display the exact contract or lot size directly on the chart. The Trade & Risk Manager script on TradingView’s public library, for example, calculates dynamic contract sizing based on your max dollar risk and the distance to a structural stop, recalculating on every tick. Scripts anchored to market structure pivots avoid the problem of logically inconsistent stops as price action evolves.
Alert and webhook strategy
Set alerts on stop levels, take-profit levels, and cumulative daily drawdown percentage. Use “Once per bar close” for drawdown alerts to avoid noise, and prefer “Once” for stop/TP hits. Route every enforcement alert through a webhook integration to an external monitor, trade manager, or notification stack so the system acts without you watching the screen.
How does UI setup reduce execution errors?
Interface clutter is the single biggest drag on execution speed and accuracy. Strip the TradingView toolbar to only what you use. Disable gridlines (Settings → Canvas), set solid green/red candle colors, and enable the status line for OHLC and volume. Save two distinct layouts: one for scanning, one for execution.
- Execution layout: Single large chart, order ticket visible, no secondary panels
- Scanning layout: Multi-chart grid, watchlist open, no order ticket in view
- Hotkey mapping: Assign market order, cancel all, partial close, and move-SL-to-breakeven to dedicated keys
- Dark high-contrast theme: Reduces eye strain during long sessions and speeds directional reading
Pro Tip: Never trade from your scanning layout. The execution layout should be a separate saved workspace you switch to only when a setup is confirmed and you are ready to act.
How do you automate drawdown monitoring and anti-overtrade rules?
Manual observation of daily drawdown is unreliable under pressure. Automated alerts tied to webhook destinations move enforcement off your memory and onto the system.
Alert patterns to implement:
- Stop-loss hit on any open position
- Cumulative daily loss reaching 50% and 100% of the daily cap
- Three consecutive losing trades (triggers a mandatory review pause)
- Session volatility spike above a defined ATR threshold
Route webhook payloads to a lightweight script or trade manager that cancels pending orders and blocks new entries when the daily cap is breached. Combine this with a hard maximum trades-per-session rule and a mandatory 30-minute cooling-off period after any drawdown breach. The behavioral guardrail matters as much as the technical one.
Active trade management: partial closes, break-even, and trailing stops
- Partial close schedule: Define percentages before entry. A common structure: close 25% at TP1 (1R), 50% at TP2 (2R), let the remainder run with a trailing stop. Never decide partial-close percentages while the trade is live.
- Break-even rule: Move the stop to break-even after price reaches 0.5–1.0R. Leave a small buffer (a few ticks) below the entry to avoid early stop-outs on normal retracements.
- Trailing stop methods: ATR-based trailing suits trending instruments on higher timeframes. Structural trailing (move stop to the most recent swing low or high) suits discretionary traders who read price action. ATR trails are more mechanical and less prone to discretionary drift.
- Correlation exposure update: After each partial close, recalculate total directional exposure across all open positions. Partial closes on one leg can create unintended net exposure when correlated trades remain open.
Validate before going live: replay, demo, and backtest checklist
| Metric | Target / Notes |
|---|---|
| Win rate | Track across minimum 100 trades before drawing conclusions |
| Average R:R realized | Should meet or exceed your pre-trade minimum (1:2) |
| Max drawdown | Must stay within daily and overall caps defined in your rules |
| Slippage realized | Compare to your friction buffer assumption; adjust if consistently exceeded |
| Execution latency | Note fills vs. alert trigger time; flag outliers for webhook tuning |
Testing sequence:
- Replay mode dry runs on historical data with the Pine Script indicator active
- Paper account forward testing across at least two instruments and two timeframes
- Backtest with slippage and commission included in strategy settings
- Forward-walk validation: run the setup on out-of-sample data before committing live capital
For high-frequency systems, 500+ trades is the practical minimum for statistically meaningful backtest results. Discretionary systems can use smaller samples but require strict forward-walk checks to avoid curve-fitting.
Validation log per session: Record script inputs (risk amount, leverage, fees), actual fills, realized slippage, and any missed fills with notes on cause.
Implementation checklist and sample Pine Script snippets
The single most common mismatch between Pine Script output and broker order sizes comes from rounding. Brokers enforce minimum lot sizes and round to the nearest valid increment. Always compare the script’s raw output to your broker’s minimum contract size and adjust inputs accordingly.
Implementation checklist:
- Save your execution layout as a named template in TradingView
- Install a position-size Pine Script indicator from the public library (search “Risk Manager” or “Position Size Calculator”)
- Configure inputs: account equity, risk per trade ($), commission per side, slippage estimate, and contract multiplier or tick value
- Enable webhook on each enforcement alert; test the payload with a paper account before live use
- Map keypad or keyboard hotkeys: market order, cancel all, partial close (25%), move SL to break-even
- Run a full end-to-end test in replay mode before touching live capital
Sample Pine Script skeleton (indicator):
//@version=5
indicator("Fixed Dollar Risk Sizer", overlay=false)

accountEquity = input.float(200000, "Account Equity ($)")
riskDollars   = input.float(1000,   "Risk Per Trade ($)")
entryPrice    = input.float(120.0,  "Entry Price")
stopPrice     = input.float(118.0,  "Stop Price")
tickValue     = input.float(1.0,    "Tick/Point Value ($)")
safetyFactor  = input.float(0.90,   "Safety Factor (0.7–0.9)")

stopDistance  = math.abs(entryPrice - stopPrice)
rawUnits      = (riskDollars * safetyFactor) / (stopDistance * tickValue)
units         = math.floor(rawUnits)

plot(units, title="Position Size (Units)", color=color.lime)
label.new(bar_index, units, "Size: " + str.tostring(units), style=label.style_label_left)
For futures, set tickValue to the dollar value of one point for your contract (e.g., $20 for NQ, $50 for ES). The safety factor of 0.7–0.9 builds in a buffer against liquidation when using leverage. For dynamic leverage, recalculate the safety factor each session based on current margin requirements.
Sample webhook alert payload:
{
  "action": "risk_breach",
  "symbol": "{{ticker}}",
  "daily_loss_pct": "{{plot_0}}",
  "timestamp": "{{time}}"
}
Key Takeaways
A professional TradingView risk management setup requires fixed-dollar sizing from a chart-defined stop, a minimum 1:2 R:R, Pine Script automation, webhook enforcement, and a decluttered UI mapped to hardware hotkeys.
| Point | Details |
|---|---|
| Define invalidation first | Set the stop on the chart before calculating size; never reverse this sequence. |
| Fix dollar or percent risk | Use (Equity × Risk%) ÷ Stop Distance; add a friction buffer for fees and slippage. |
| Enforce 1:2 minimum R:R | Professional desks mandate at least 1:2 before any trade is executed. |
| Automate with Pine Script and webhooks | Install a position-size indicator and route drawdown alerts via webhook for automated enforcement. |
| Key-trade keypad for execution | Map partial close, break-even, and cancel-all to programmable keys for faster, error-free execution. |
What pro traders actually do when conditions break down
The setups above work on paper. Under live pressure, what separates professional desks from retail accounts is that the rules are already baked into the workflow before the session starts.
At a prop desk, the daily loss stop is not a mental note. It’s a webhook alert that fires at 50% of the cap and again at 100%, triggering a hard block on new entries. The trader doesn’t decide whether to keep going. The system decides. That removes the single most dangerous variable in trading: the in-session judgment call made after a loss.
Hardware hotkeys play a specific role here. When a trade moves against you fast, the difference between clicking through menus and pressing a single key for “cancel all” or “move SL to break-even” is not trivial in volatile conditions. Muscle memory built on a physical keypad means the right action happens before the emotional response does.
The one scenario where automated rules get overridden is a genuine data or connectivity anomaly. On a professional desk, that override is logged, timestamped, and reviewed. It is never a discretionary “I think this one is different” call. If your setup doesn’t include a documented exception process, it isn’t a professional setup yet.
The Key-trade Professional Trading Keyboard fits this workflow
Faster execution starts with removing the mouse from critical actions. The Key-trade Professional Trading Keyboard gives you programmable keys mapped to your most-used TradingView actions: place market order, partial close, move stop to break-even, and cancel all. Tactile mechanical switches provide immediate physical confirmation of each keypress, which matters when you’re executing under pressure.
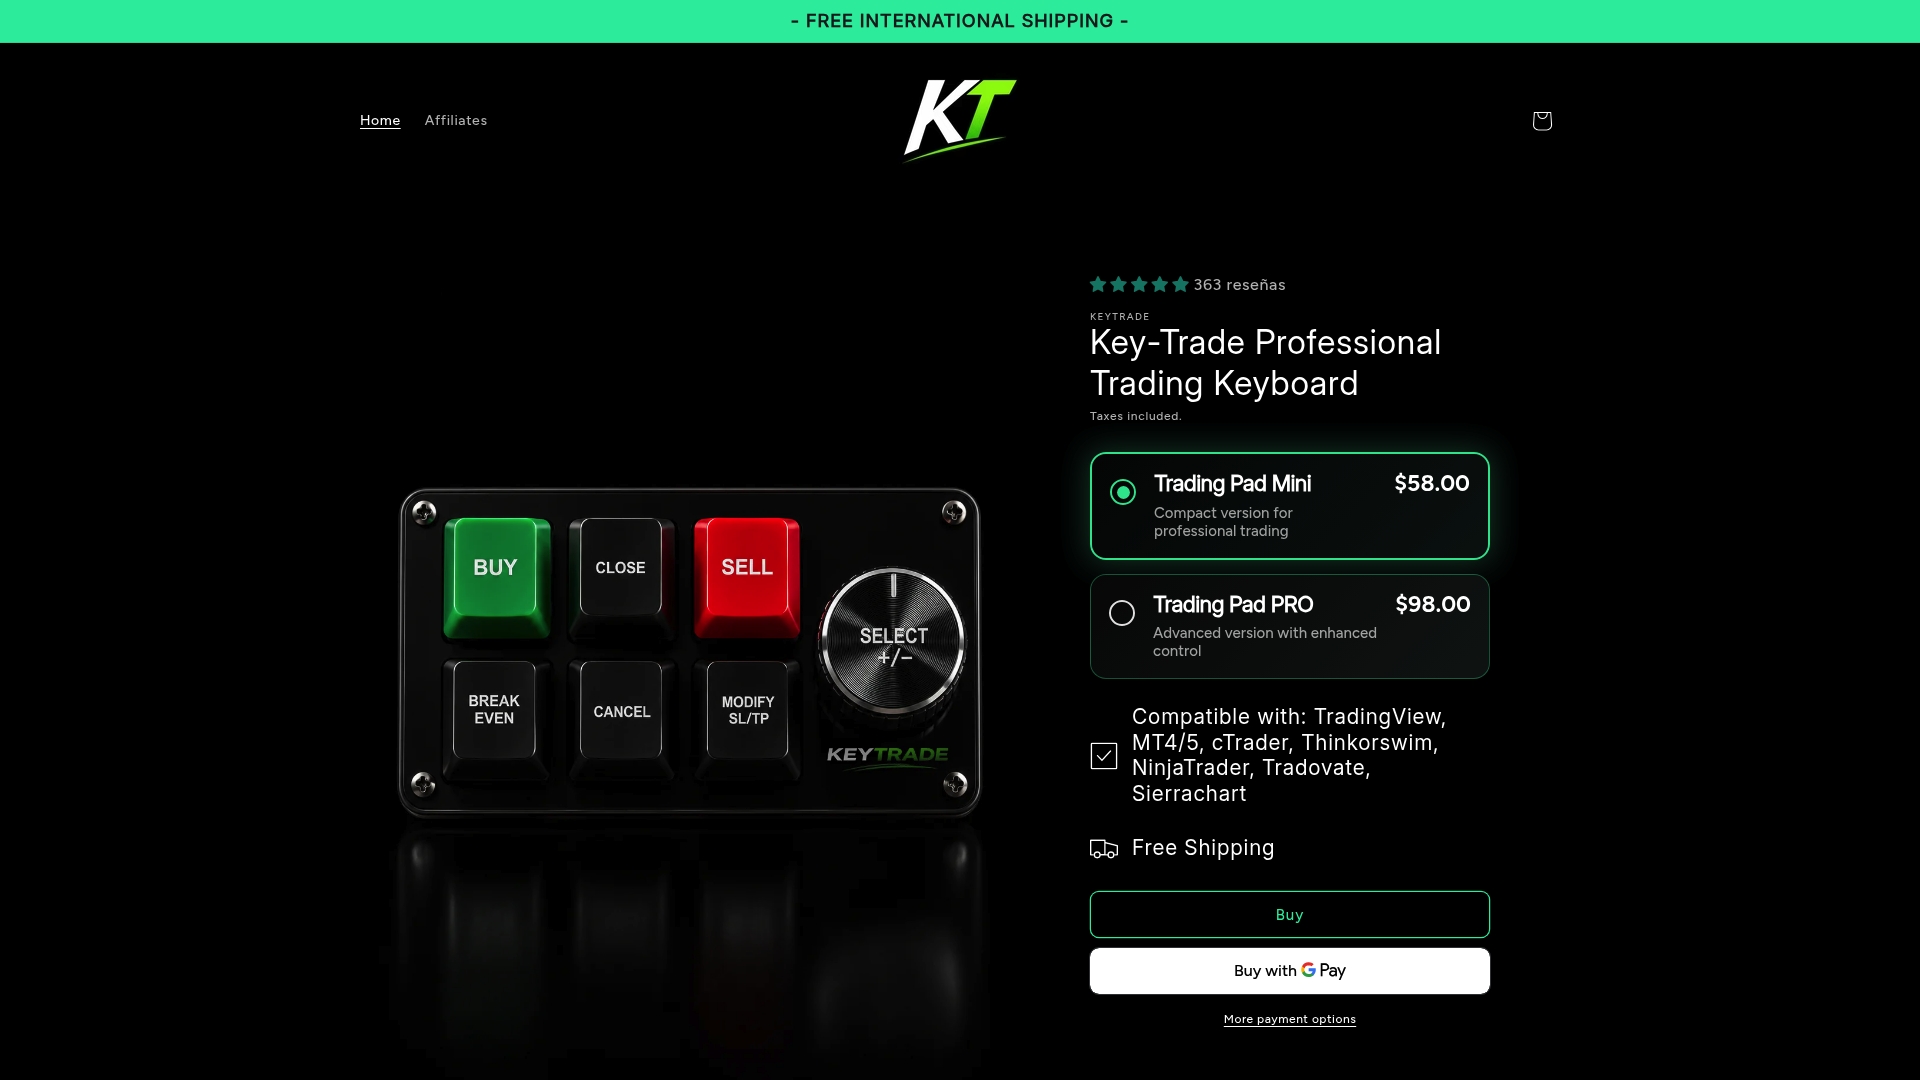
Place the keypad to the left of your primary keyboard, within reach without moving your arm. Map the four to six actions you use most in live trading to the top row. Run muscle-memory drills in replay mode until the keystrokes are automatic. TradingView’s native hotkey limitations make an external programmable keypad the practical solution for traders who need sub-second execution without menu navigation.
Browse the Key-trade keyboard lineup and select the layout that matches your workflow. Worldwide shipping is available, and no technical setup knowledge is required.
Useful sources for further reading
- Risk Management for FTMO Traders — PineConnector: Covers automated stop-loss, drawdown monitoring, and webhook integration for prop trading rules
- TradingView Setup Guide — Signal Pilot Blog: UI declutter, hotkey mapping, and alert configuration for professional workflows
- Trading Risk-Reward Calculator Guide — TradingView.top: Pre-trade sizing workflow and decision-quality framework
- TradingView Risk Management — PickMyTrade: Backtesting with slippage/commission, stop-loss configuration, and contract multiplier guidance
- Ultimate Risk Manager Script — TradingView: Fixed-dollar risk Pine Script indicator with leverage and fee inputs
- Position Risk Manager Script — TradingView: Pivot-anchored position sizing that recalculates on tick
- Risk Management Script (i_cj) — TradingView: Safety-factor implementation for dynamic leverage environments
- Key-trade TradingView Trade Management Guide: Platform-specific trade management and Pine Script configuration notes
- Key-trade: Execute Trades Faster on TradingView: Hotkey mapping and execution layout setup for TradingView
FAQ
What is the minimum risk-to-reward ratio for professional traders?
The professional standard is a minimum 1:2 risk-to-reward ratio before executing any trade. Higher-volatility instruments or lower win-rate systems often require 1:3 or better.
How do you automate position sizing in TradingView?
Install a Pine Script position-size indicator from TradingView’s public library, input your fixed-dollar risk, tick value, and safety factor, and the script displays the exact contract or lot size directly on the chart.
Can TradingView alerts enforce daily drawdown limits automatically?
Yes. Set a TradingView alert on a cumulative daily loss percentage and route it via webhook to an external monitor or trade manager that blocks new entries when the cap is breached.
What is a safety factor in a Pine Script risk calculator?
A safety factor (typically 0.7–0.9) reduces the calculated position size by a fixed percentage to create a buffer against liquidation when using leverage, accounting for spread, fees, and slippage beyond the theoretical stop distance.
Why use a hardware keypad alongside TradingView for risk management?
TradingView has limited native hotkey support, so a programmable hardware keypad like the Key-trade Professional Trading Keyboard maps critical actions (partial close, cancel all, break-even) to single keypresses, reducing execution time and input errors under live market pressure.
Recommended
- cTrader Risk Management Tools List for Prop Traders – Key-Trade Trading Keyboards
- NinjaTrader Risk Management Hardware Setup Guide – Key-Trade Trading Keyboards
- TradingView Trade Management Tools: 2026 Guide – Key-Trade Trading Keyboards
- cTrader Trade Management Features: Complete 2026 Guide – Key-Trade Trading Keyboards