

MT4 Keypad Setup: A Pro-Grade Guide for Active Traders
Yes, you can get a hardware keypad running reliably with MetaTrader 4, and it will hold up under prop-firm scrutiny, if you follow one sequence: connect the device, install its drivers and profile software, attach an EA that listens for key-codes, map every button to a tested action with hard risk limits, and run a full demo test before touching a funded account. Skip the demo step and you’re gambling with fat-finger risk on real capital.
Here’s the short version before the full breakdown:
- Connect the keypad and install drivers/firmware
- Install the keypad’s profile mapping software
- Install the MT4 EA or plugin, attach it to a chart, and allow live trading/DLL imports
- Map keys to Buy, Sell, Close All, Break-even, Partial Close, and Modify SL/TP
- Set fixed-lot or percentage risk limits inside the EA mapping, not just the keypad
- Run the full demo test protocol
- Load the correct account-specific profile (demo, prop-firm, live)
- Go live only after every mapped function passes
Keep MT4 as the focused, active window during setup and testing. Most key-code listeners only capture input when MT4 is the foreground application, and that single detail causes more “my keypad stopped working” support tickets than anything else.
Key Takeaways
A reliable MT4 keypad setup depends on sequencing hardware installation, EA-level risk limits, and full demo testing before any live or prop-firm account goes near it.
| Point | Details |
|---|---|
| Sequence matters | Install drivers first, then keypad software, then the MT4 EA, then map buttons, then demo-test. |
| Risk limits live in the EA | Set max lot size, max simultaneous orders, and a rate limit inside the EA, not just the keypad software. |
| MT4 must stay focused | Most key-code listeners only capture input when MT4 is the active window. |
| Demo test every mapped function | Run the full test sequence, including rapid keypresses and a mid-session disconnect, before going live. |
| Key-Trade ships tested profiles | Key-Trade’s keypad bundle includes prebuilt MT4 profiles, firmware updates, and setup support for demo verification. |
Table of Contents
- MT4 Keypad Setup Prerequisites You Need to Check First
- How Do You Physically Install and Connect a Trading Keypad?
- Setting Up Keypad Profiles and Button Mapping for MT4
- Configuring the MT4 EA to Accept Keypad Commands
- What Does a Standardized Demo Test for a Keypad Look Like?
- Fixing Common MT4 Keypad Problems
- Backing Up Profiles and Getting Support When Something Breaks
- Why a Dedicated Hardware Keypad Pays Off for Serious Traders
- Get a Prebuilt MT4 Keypad Setup With Key-Trade
- Sources and Further Reading
- FAQ
MT4 Keypad Setup Prerequisites You Need to Check First
Before you plug anything in, confirm the basics that determine whether the rest of the process goes smoothly or turns into an afternoon of driver troubleshooting.
Check your operating system against the keypad’s supported list, and note whether it connects as a USB HID device or requires a USB-to-serial adapter. HID devices generally install without extra drivers; serial adapters often need a manufacturer driver and, on Windows, administrator rights to install.
On the MT4 side, confirm your terminal build supports Expert Advisors with DLL imports enabled, since most keypad-to-MT4 bridges rely on an EA that needs that permission turned on. If you trade with a prop firm, check the firm’s rules on which EAs and automated inputs are permitted on funded accounts before you install anything, since some firms restrict third-party executables even when they don’t touch strategy logic.
- Confirm OS and connection type (USB HID vs. USB-to-serial) match your keypad
- Verify your MT4 build allows EAs and DLL imports
- Check demo account availability with your broker for testing
- Review prop-firm rules on EAs and automated key-code tools
- Confirm you have local admin rights for driver installation
- Whitelist the keypad software and MT4 EA in your antivirus/endpoint settings
Pro Tip: Antivirus and endpoint-protection software occasionally flags key-code listener EAs as suspicious because they intercept input. Whitelist the specific EA file before installation instead of disabling protection entirely.
How Do You Physically Install and Connect a Trading Keypad?
Getting the hardware talking to your computer correctly is the foundation everything else builds on. Rushing this step is where most reliability problems start.
Before connecting anything, check the box contents: the keypad itself, the USB cable, any spare keycaps, and a printed mapping reference card if one is included. Note the firmware version if it’s listed anywhere, since some units ship with outdated firmware that needs an update before the software will recognize every button correctly.
- Plug the keypad directly into a USB port on your computer, avoiding unpowered USB hubs where possible.
- If the device uses a USB-to-serial connection, install the adapter driver first, then confirm the device shows up in Device Manager on Windows (or System Report on macOS) as either a HID device or a COM port.
- Install the official drivers from the manufacturer, restarting your computer if prompted.
- Check for a firmware update in the companion software, and only run the update on stable power and a direct USB connection, never through a hub or during a laptop battery cycle.
- Confirm the LED indicators light up as expected, then open the diagnostic utility (if the keypad ships with one) to verify every physical button registers a signal.
- Open a plain text editor and press each button to confirm it produces a keystroke or recognizable input before you ever open MT4.
That last step matters more than it looks. If a button doesn’t register in a text editor, no amount of MT4 configuration will fix it, and you’ve just saved yourself an hour of troubleshooting the wrong layer.
Pro Tip: Firmware updates that get interrupted by a USB disconnect can brick a keypad. Never update firmware over a laptop running on battery or through a hub that shares bandwidth with other devices.
Setting Up Keypad Profiles and Button Mapping for MT4
This is where the keypad software turns physical buttons into meaningful trading commands, and it’s the step that determines whether your setup is fast and safe or fast and reckless.
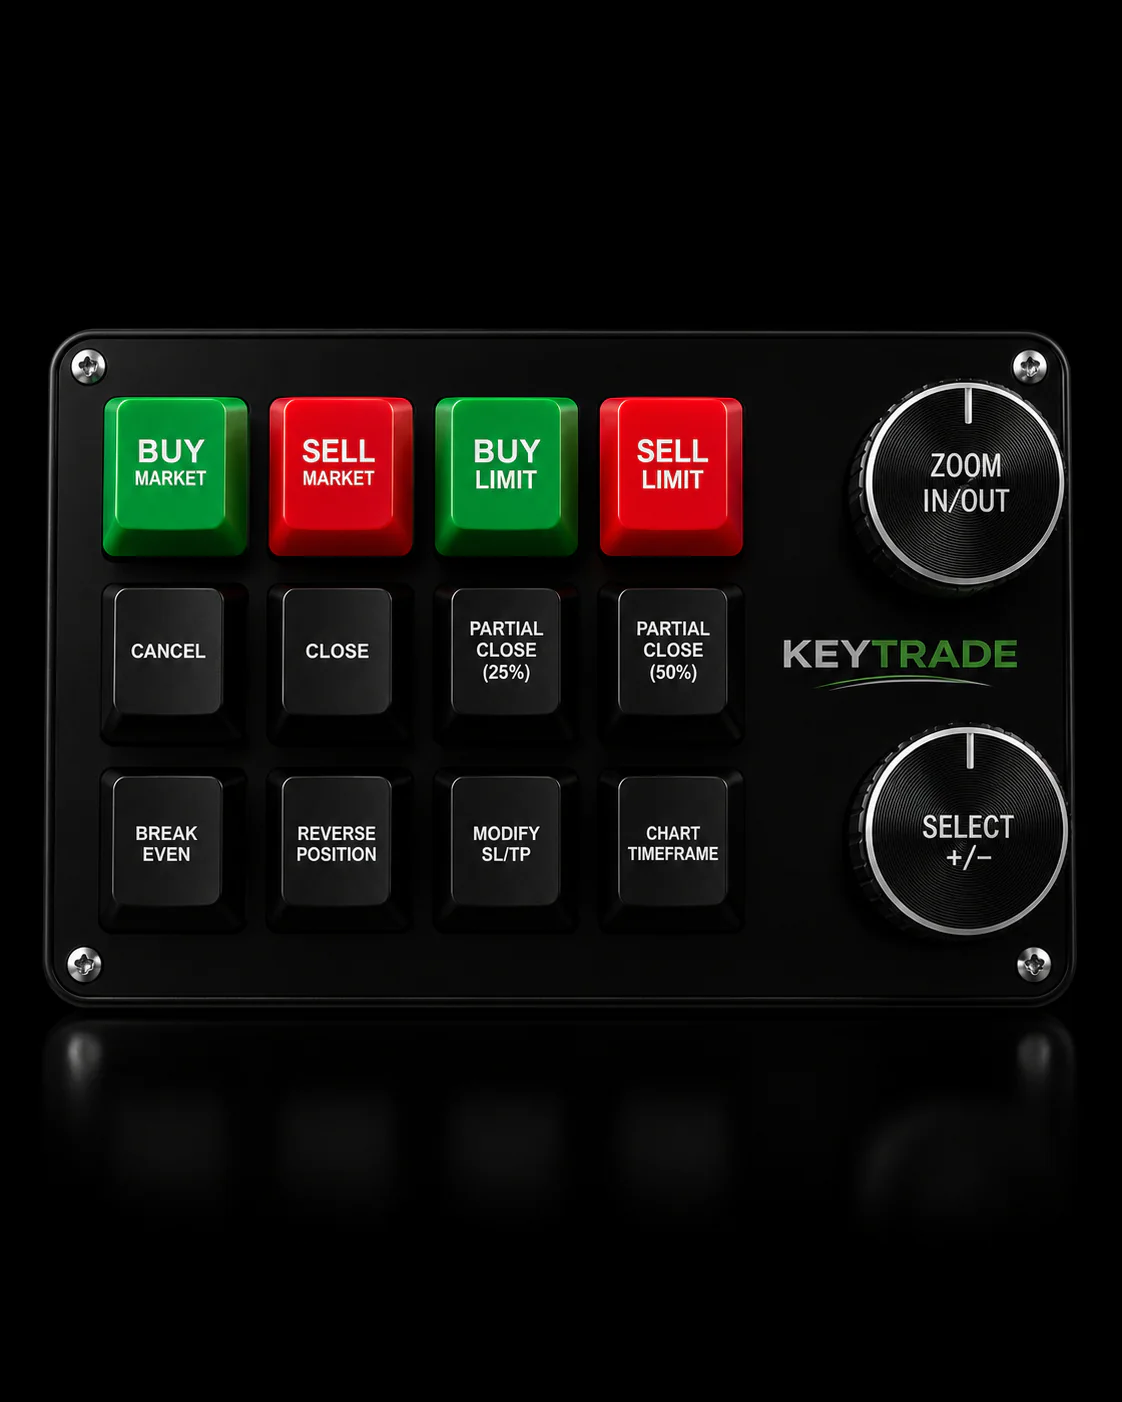
Start by building separate profiles for each account type: one for demo, one for any prop-firm evaluation account, and one for live. Trading keyboard utilities commonly ship with profile-based presets for different account types, which makes it easy to keep a scalping layout separate from a swing-trading layout without rebuilding mappings each time you switch accounts.
For core commands, a mapping convention that holds up under pressure looks like this:
- Buy / Sell: two adjacent, distinct keys, ideally non-printing keys like function keys or numpad keys to avoid accidental OS shortcut conflicts
- Close All: a key placed away from Buy/Sell to prevent an accidental full liquidation
- Break-even: a dedicated key, since this is used constantly once a trade moves in your favor
- Partial Close: paired with a defined percentage (25%, 50%) set in the EA, not guessed at execution time
- Modify SL/TP: often mapped with a modifier key (Shift or Ctrl) combined with a directional key
- Panic Close: a separate, physically isolated key reserved only for emergency full exits
Use stable key codes (ASCII or scan codes) rather than relying on printable characters that might double as OS shortcuts. Keyboard-to-MT4 tools generally let you remap defaults by changing the underlying key ID, which is worth doing early rather than fighting conflicts later.
Once mapping is done, export the profile and name it clearly by account purpose, like DEMO_EURUSD_Scalp or PROP_LIVE_Main, so loading the right one at session start takes seconds, not guesswork. Avoid two-key combo sequences unless you’ve confirmed near-zero latency and guaranteed MT4 focus, since combos are the first thing to break under real-world lag.
Configuring the MT4 EA to Accept Keypad Commands
The keypad is only half the system. The EA or plugin running inside MT4 is what actually translates a key-code into an order, and this is where risk controls belong, not just convenience.
Copy the EA file into your MT4 Experts folder, restart the terminal, then drag the EA onto the chart of the instrument you plan to trade. You’ll need to enable Allow DLL imports and Allow live trading in the EA’s properties for most key-code listeners to function, since many of these tools intercept keyboard events at a system level that MT4 doesn’t handle natively.
Inside the EA’s input settings, you’re typically configuring parameters like BuyKeyCode, SellKeyCode, LotMode (fixed vs. percentage risk), MaxRiskPct, and PartialClosePct. This is the layer where safety actually lives:
- Set a maximum lot size the EA will never exceed, regardless of what the keypad sends
- Cap maximum simultaneous open orders to stop a stuck key from stacking trades
- Add a rate limit (a minimum number of milliseconds between orders) to prevent runaway execution from a jammed or double-pressed button
- Use an account whitelist inside the EA so a profile built for one account can’t accidentally fire on another
MT4 generally needs to be the active, focused window to receive keyboard input in most listener implementations, which is a real limitation worth planning around. Background listeners exist, but they trade that convenience for a higher risk of misfires when another application briefly steals focus.
If your keypad software supports it, set up a hotprofile key or auto-load rule so the correct account profile loads the moment you attach the EA to a chart, removing the chance you’re trading a live account with a demo mapping still active.
Pro Tip: Set MaxRiskPct and MaxLotSize even on your demo profile. Testing with production-grade limits from day one means there’s no “loosen it for live” step where mistakes creep in.
What Does a Standardized Demo Test for a Keypad Look Like?
Demo testing isn’t optional busywork. It’s the only reliable way to confirm your mapping, your EA’s risk logic, and your keypad’s timing all behave the way you expect before real money or a prop-firm evaluation is on the line.
- Open a demo account and load the exact profile you intend to use live.
- Test a single Buy and a single Sell at fixed lot size, and confirm the order fills with the correct volume.
- Test Buy and Sell using percentage-risk sizing, and manually verify the calculated lot size matches your account balance and risk setting.
- Trigger Close All and confirm every open position closes, not just the most recent one.
- Trigger Partial Close and verify the exact percentage closed matches what you configured, not an approximation.
- Trigger Break-even and confirm the stop-loss moves to entry price (plus any buffer) as expected.
- Test Modify SL/TP and confirm the correct price levels are set.
- Rapidly press the same key multiple times to confirm your rate limit prevents order stacking or duplicate execution.
- Disconnect the keypad mid-session to confirm MT4 and the EA fail safely without leaving orphaned orders or a frozen terminal.
Measure the round-trip time from keypress to order confirmation while you’re at it. Scalpers generally want that latency as close to instant as possible, while intraday and swing traders have more room to tolerate a slight delay without it affecting outcomes.
Every test case on this list needs to pass, cleanly and repeatedly, before you load a live or prop-firm profile. Standardized demo testing before live deployment is the difference between a keypad that saves you seconds and one that costs you a funded account.
Pro Tip: Run the full test sequence twice on two different trading days. A mapping that works perfectly during a quiet Tuesday morning can behave differently during high-volatility news releases when server response times slow down.
Fixing Common MT4 Keypad Problems
Most keypad failures trace back to a small handful of causes, and working through them in order saves time.
If a button does nothing, first confirm MT4 is the active, focused window, since that’s the single most common culprit. Next, check that the EA is actually attached to a chart and running (a gray smiley icon in the corner means it’s not active). Then check for case sensitivity: several MT4 hotkey tools require exact uppercase key-code matches, and a mismatched case is an easy thing to overlook.
- Reproduce the issue in a text editor first to isolate hardware vs. software problems
- Check Device Manager (or macOS System Report) to confirm the keypad is still enumerating correctly
- Enable EA logging and check the MT4 Journal tab for rejected orders or error codes
- Rule out USB power issues by connecting directly to the computer, not through a hub
- Re-check firmware version against the current release if behavior changed after an update
For reliability, use a dedicated USB port (not a hub), disable USB power-saving in your OS power settings, and lock each profile to a specific account ID inside the EA. A hardware panic key mapped to Close All on its own kill-switch profile is worth setting up even if you never expect to need it. Re-test your full mapping any time MT4, the EA, or your OS updates.
Backing Up Profiles and Getting Support When Something Breaks
Export every profile to a named file the moment it’s working, and keep a copy of your EA configuration alongside it. Store a local copy of the current firmware installer and the previous version too, since a rollback option matters more than it seems the day an update goes wrong.
- Export and label profiles by account (e.g.,
PROP_LIVE_v2.cfg) - Save EA input configuration files separately from keypad profiles
- Keep the current and previous firmware installers on hand
- Update firmware only on stable power and a direct USB connection
- Before contacting support, gather your device serial number, MT4 Journal log entries, and a description of what you pressed and what happened
Why a Dedicated Hardware Keypad Pays Off for Serious Traders
The real value of a hardware keypad isn’t speed for its own sake. It’s the combination of faster execution and enforced consistency, since a properly mapped Close All or Break-even key does the same thing every time, without the shake or hesitation that creeps in during a losing streak. For prop-firm traders, exported profiles double as an audit trail showing exactly how risk limits were configured.
That said, a keypad isn’t for everyone. If you place a handful of trades a week or you’re comfortable with your platform’s native one-click tools, the setup and testing overhead probably isn’t worth it. This is a tool for traders whose edge depends on shaving seconds off execution, repeatedly, under pressure.
Get a Prebuilt MT4 Keypad Setup With Key-Trade
Skip the trial-and-error of sourcing a generic keypad and stitching together an EA yourself. Key-Trade builds hardware specifically for MT4, MT5, and other major platforms, with a profile library already mapped to the commands covered in this guide, Buy, Sell, Close All, Break-even, Partial Close, and Modify SL/TP, ready to demo-test on day one instead of week two.
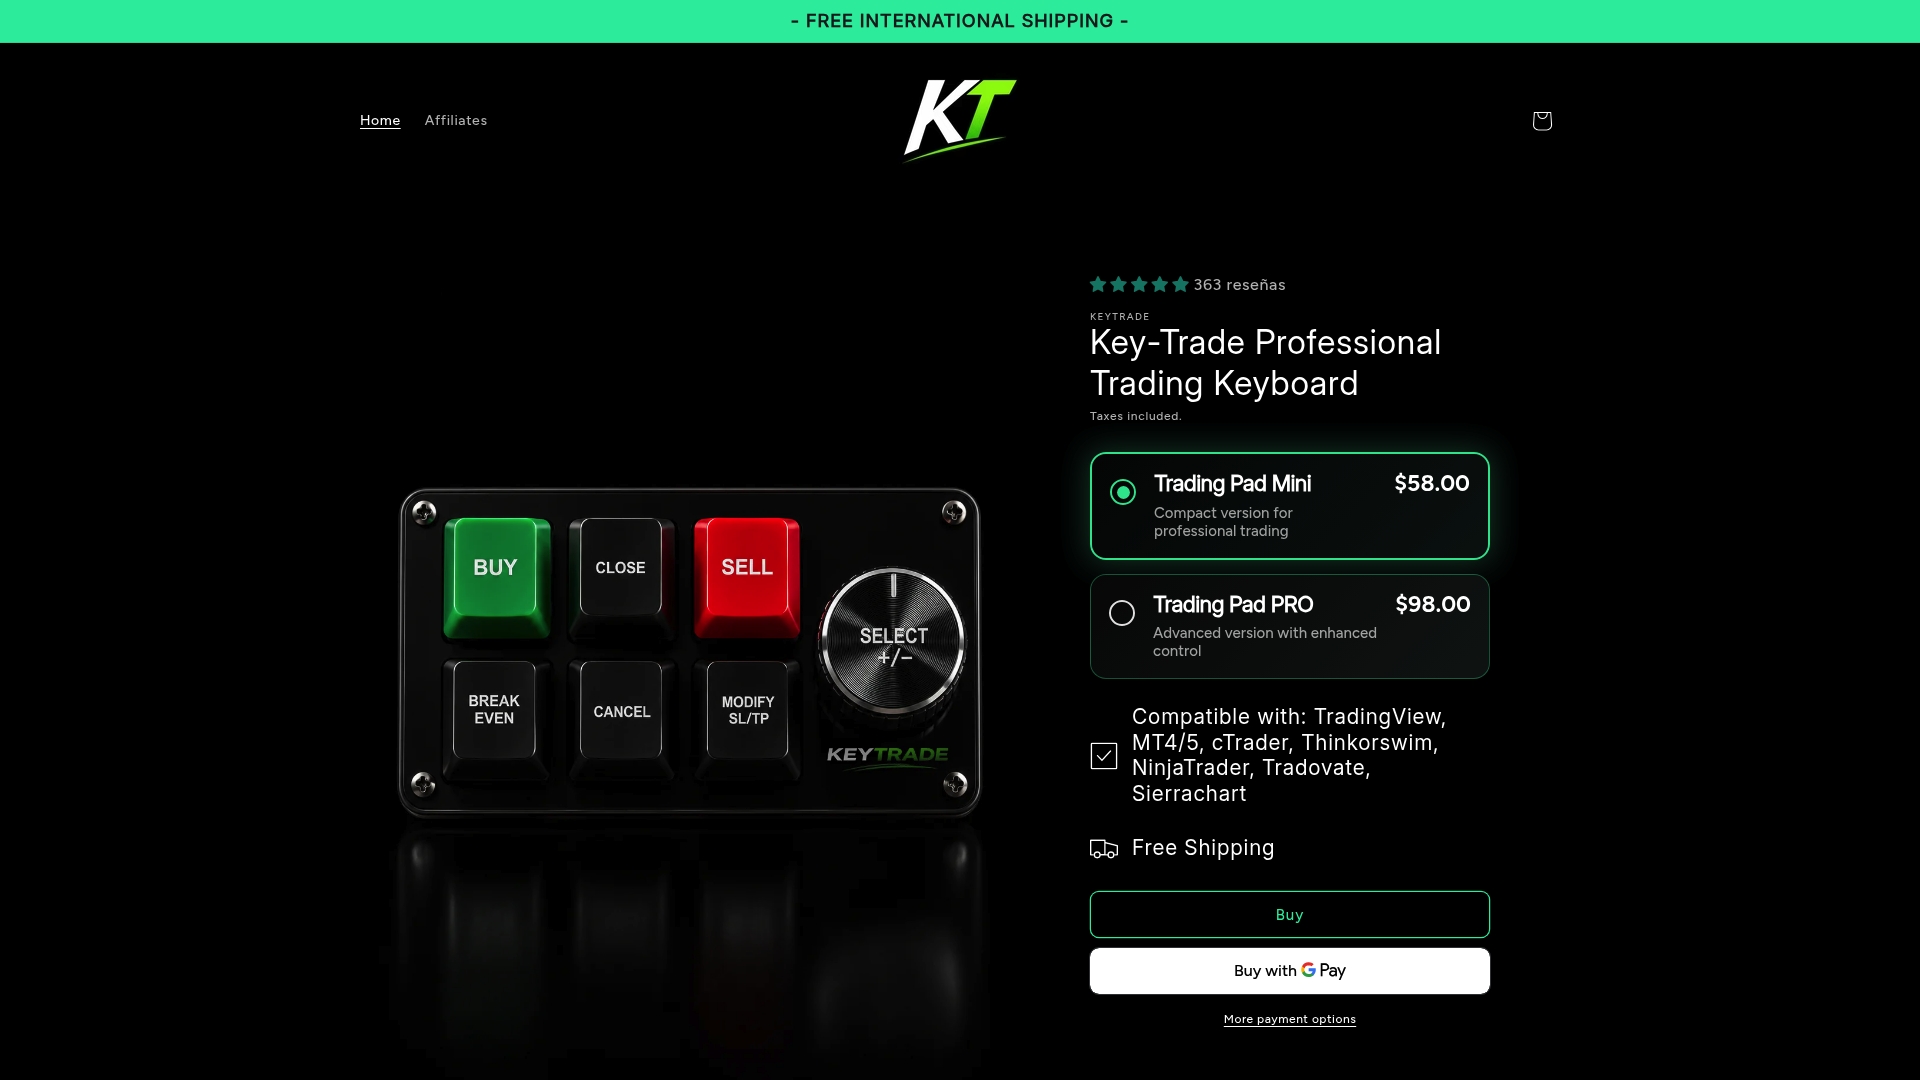
Every device ships with firmware updates, exportable profiles for demo, prop-firm, and live accounts, and setup support if you get stuck verifying a mapping. If you’d rather build your own mapping from scratch first, the MT4 hotkey setup breakdown walks through the process in more depth. Otherwise, check the Key-Trade keypad lineup and get a device with the risk-limit logic and demo profiles already built in.
Sources and Further Reading
- Community discussion on interbank keypads vs. generic programmable keypads
- Key-Trade device and support page
FAQ
Do I Need a Special MT4 Version for a Keypad Setup?
Your MT4 build needs to support Expert Advisors with DLL imports enabled, since most keypad-to-MT4 bridges rely on an EA to translate key-codes into trade commands.
Why Isn’t My Keypad Responding Inside MT4?
The most common causes are MT4 not being the focused window, the EA not being attached to the active chart, or a case-sensitive key-code mismatch between the keypad and the EA settings.
Can I Use the Same Keypad Profile for Demo and Live Accounts?
You should build separate profiles for demo, prop-firm, and live accounts, since account-specific profiles with EA-side whitelisting prevent a mapping error from executing on the wrong account.
How Do I Set Risk Limits So the Keypad Can’t Overtrade?
Configure maximum lot size, maximum simultaneous orders, and a minimum-millisecond rate limit inside the EA’s input settings, not just within the keypad’s own software.
Does Key-Trade’s Keypad Come With MT4 Profiles Already Mapped?
Yes, Key-Trade’s keypad ships with a profile library preconfigured for common MT4 actions like Buy, Sell, Close All, and Break-even, along with setup support for demo verification.
Recommended
- MT4 Hotkeys: Hardware Keypads for Professional Traders – Key-Trade Trading Keyboards
- Key Trading Keypads: Best Picks for Active Traders – Key-Trade Trading Keyboards
- Trading Keyboard for Active Traders: 2026 Guide – Key-Trade Trading Keyboards
- External Trading Keypads for MT5: Speed and Accuracy – Key-Trade Trading Keyboards